Like Button

Showing posts with label Technique Tuesday. Show all posts

Thursday, January 7, 2021

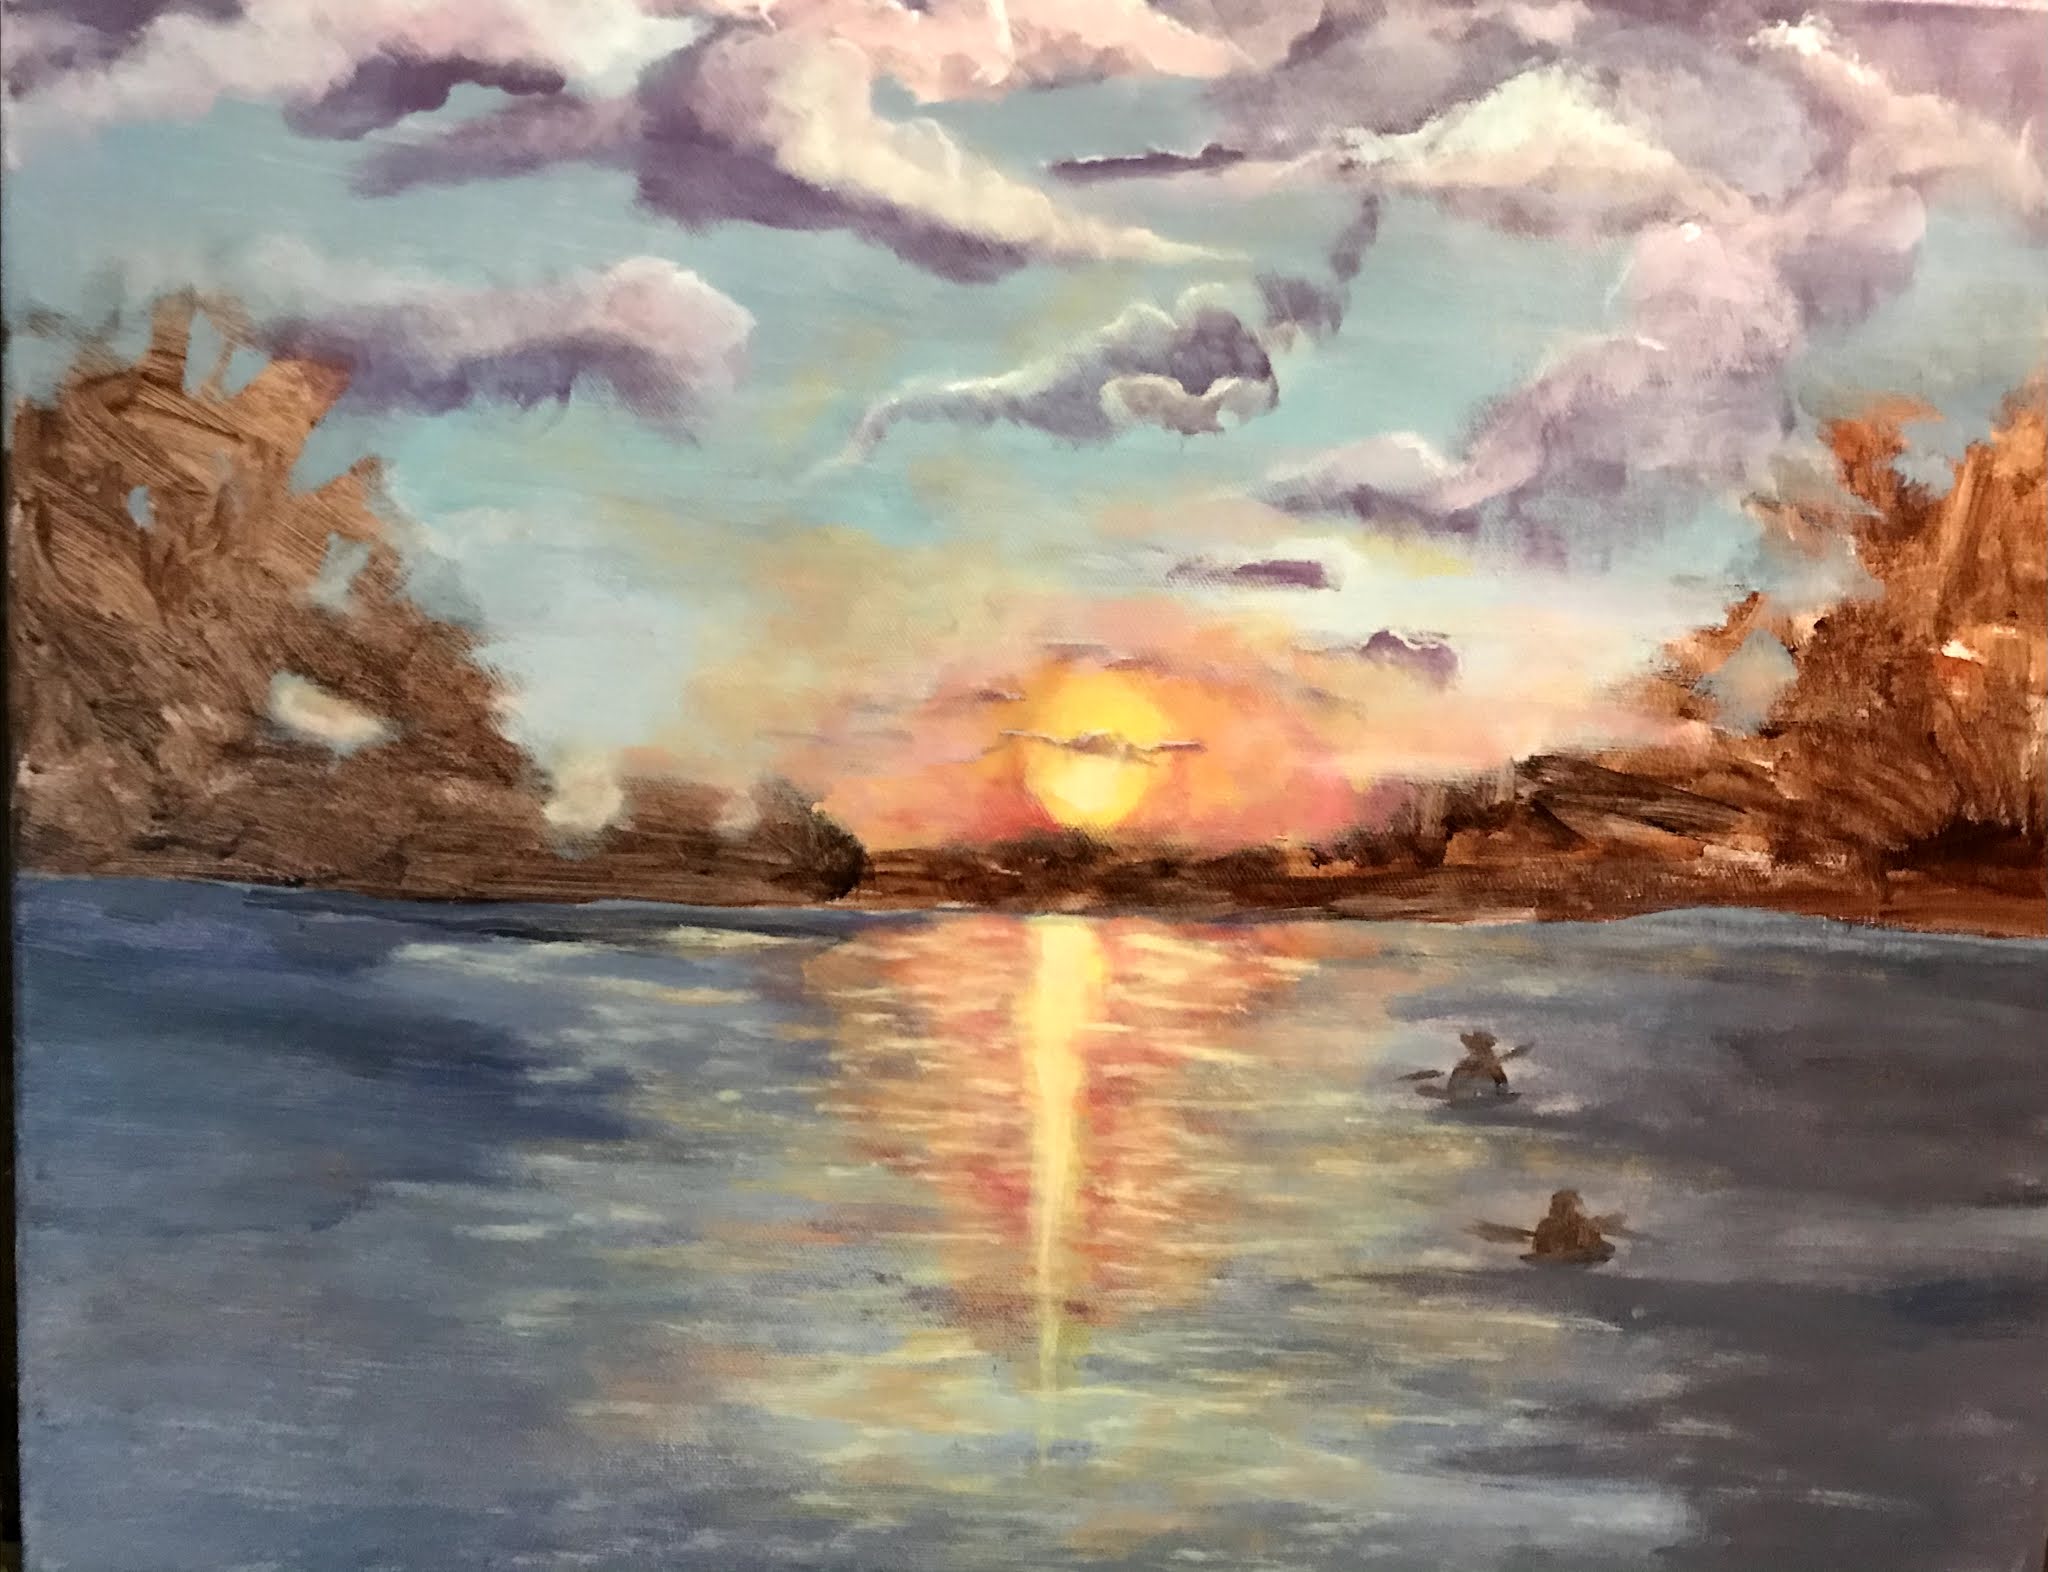
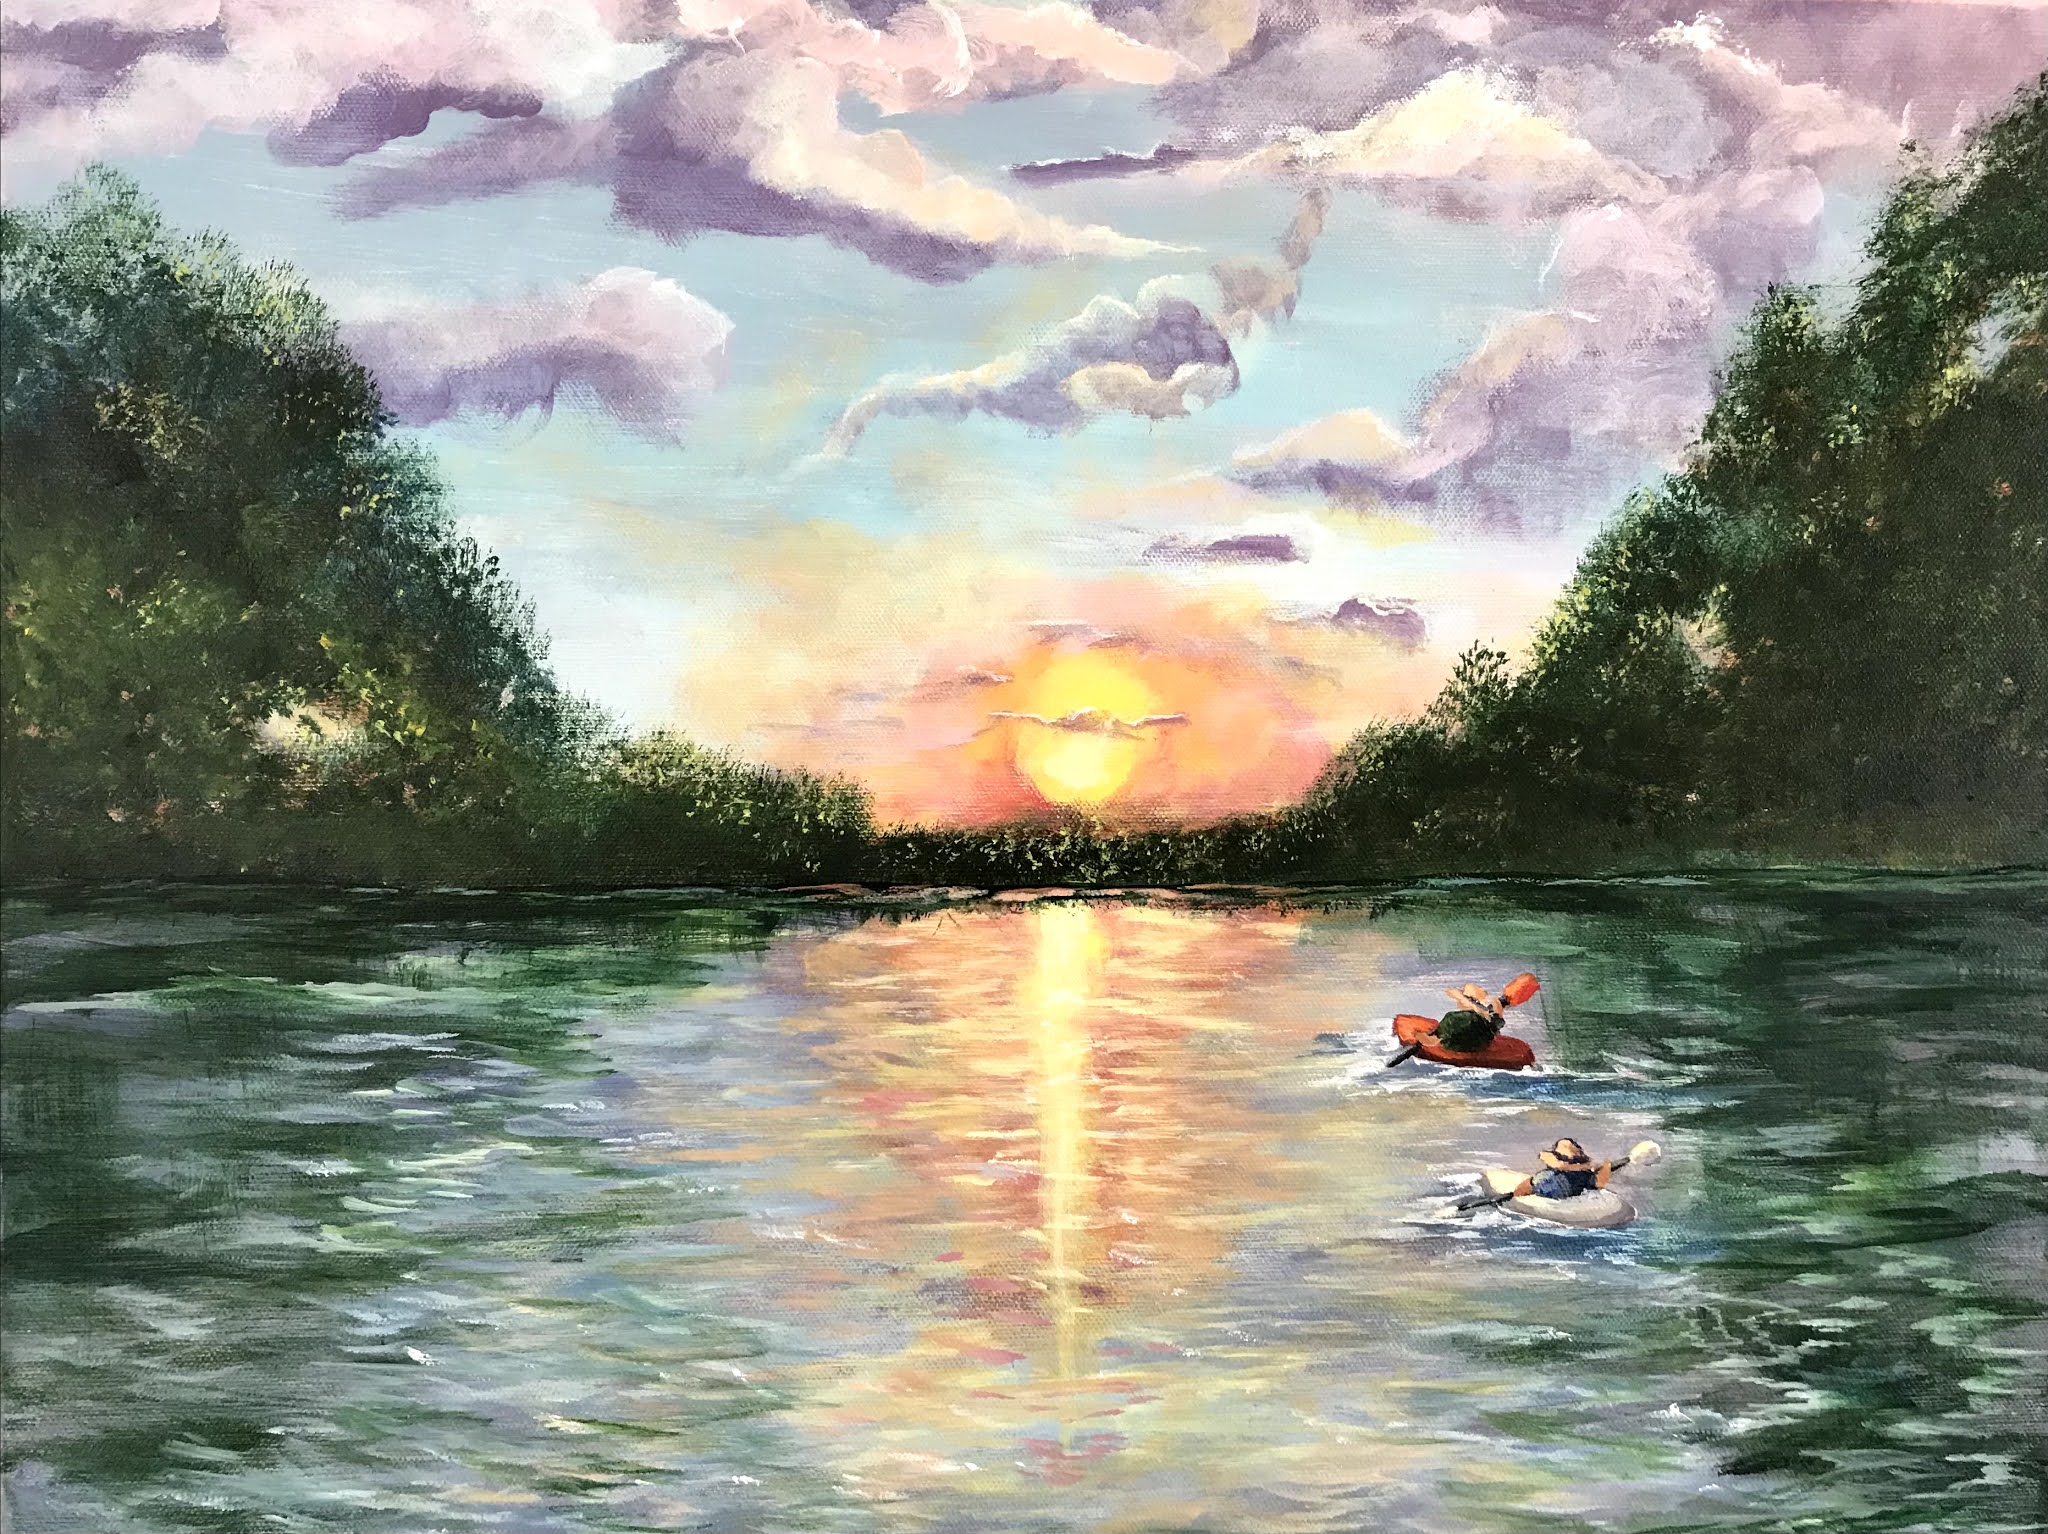
Kayaking Commission

 Kayaking Commission


One of my very best supporters, 

we'll call her Missy,

contacted me around Thanksgiving and asked if I could paint a commission for her husband for Christmas.  

I was thrilled that she asked.

So thrilled I said YES!

I have a basic contract I send out for all commissions and even though we've been friends for well over 20 years, I sent it to her as well, so we both knew what to expect.

She sent me a beautiful photo of a sunset on a river or a lake, with one kayaker in it and asked me if I could put another in it also.

The first one was her husband and she wanted me to add her in the painting.

She sent me photos of them in their boats so I could get a feel of the colors, the types of paddles, clothing and hats they usually wore.  

Next, I did a pencil sketch of the scene.


I start with this sketch and if we agree I'm the right person for the job, we move forward.

My process is to keep a client involved in the creativity of the piece all along the way so they know exactly what they are getting.  I can fix things much earlier in the process than be ready to deliver the work and find out I went totally in the wrong direction.  

Missy liked the feel of the sketch even though the boats were wrong, the perspective is what we were looking for at this point.  


This is the first sketch in acrylic paint on the canvas. 

I'm looking to get the perspective of the distance and the size

of the boats correct.  

You will see almost none of this in the final painting.


The clouds were dramatic in the photo as was the sun, 
so they went in first.


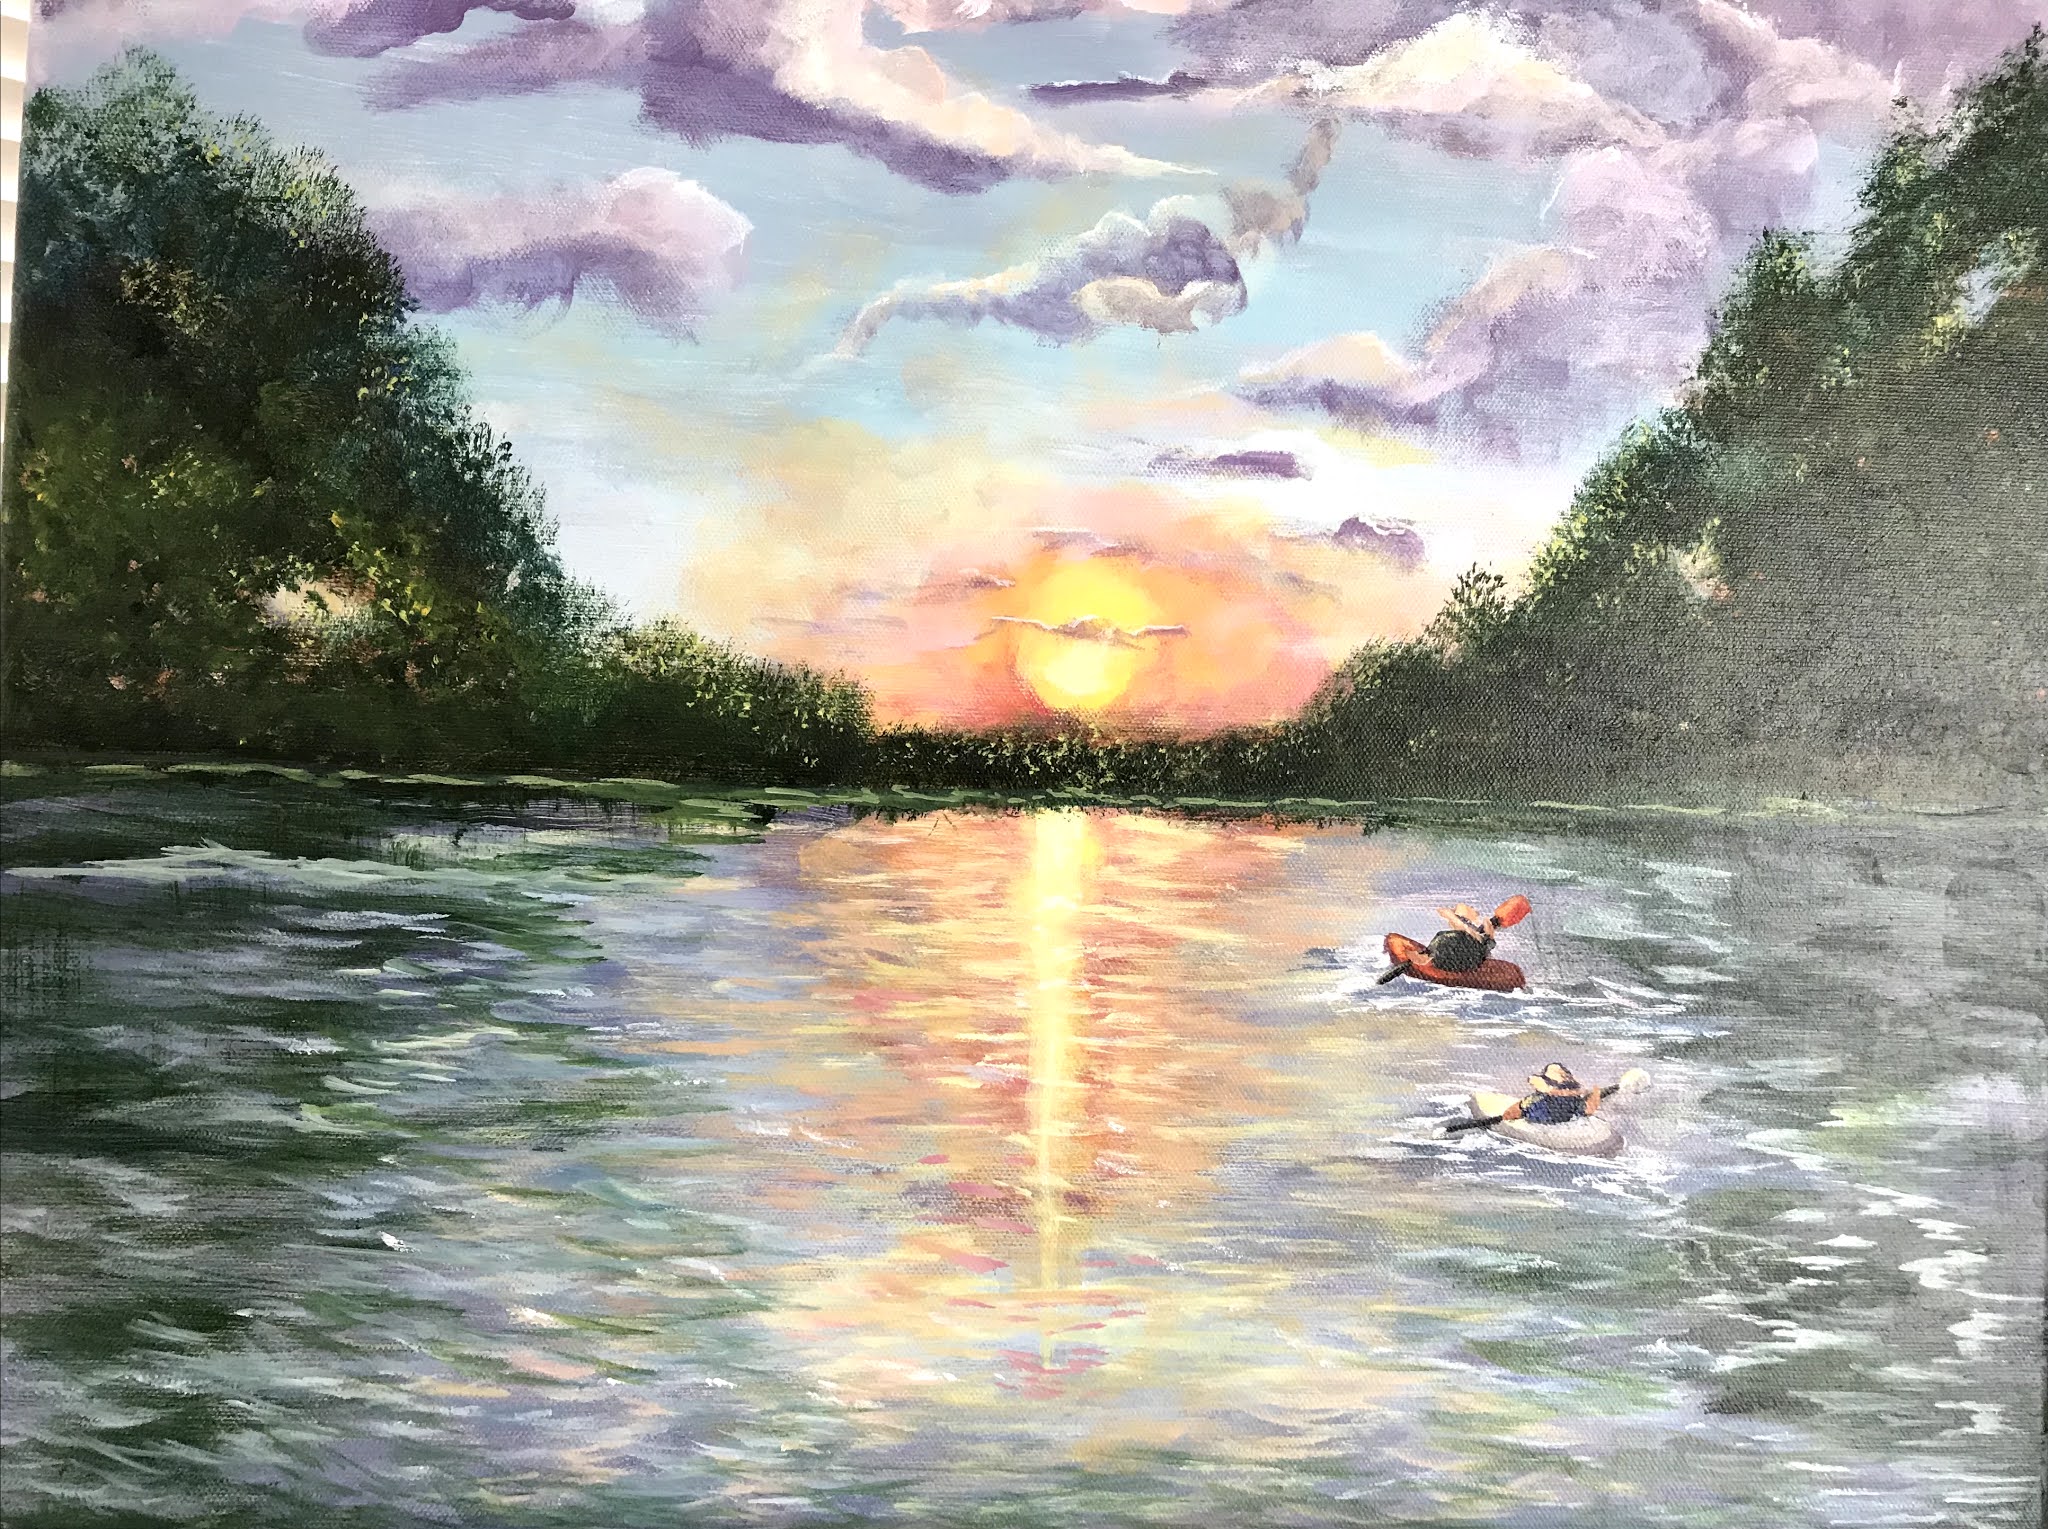
Refining the clouds, the sun and beginning to add in water and reflections.  Still haven't don't anything with the trees.


Toned down the sunset a little, started adding the trees, and 

putting the boats in. 


Getting more color and definition on the boats, 

and trying to get a glassy effect on the water.  


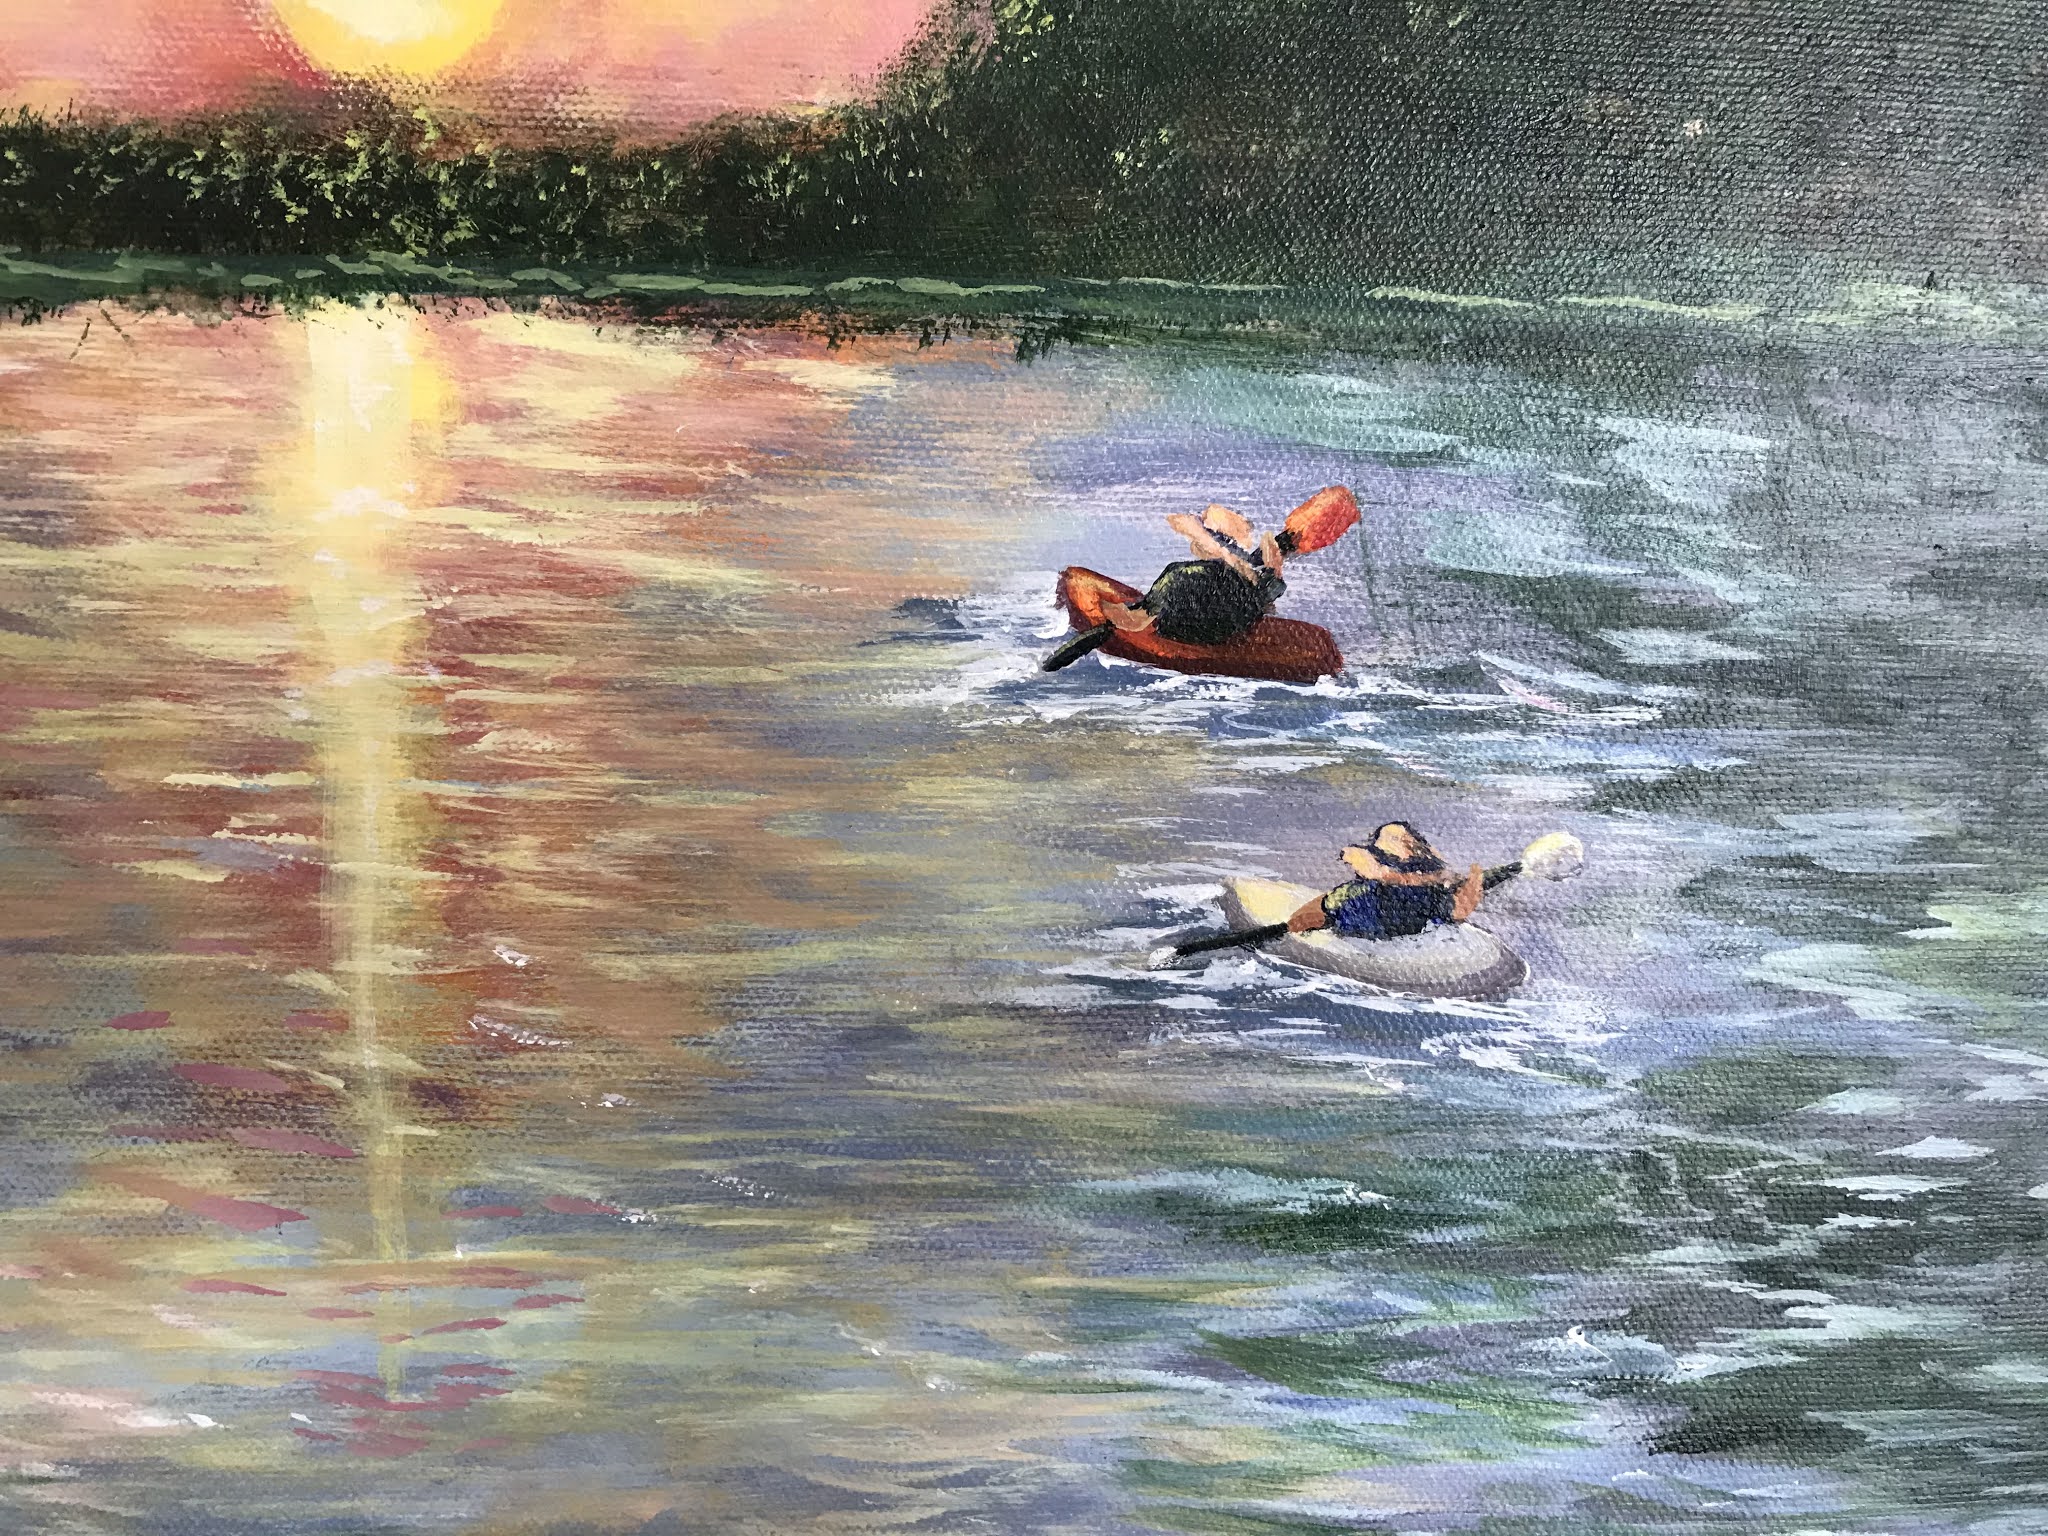
Here's a closer look at the kayakers.


Here's an even closer look.  

I usually send the client a time-lapse video of the work progressing and a close-up video of the finished painting, just so there are no surprises for either of us.


Sometimes in doing commissions, the artist is trying to get a vision of something out of someone elses head.
Not always an easy task.  

But so far, my method has worked well for me.

If you would like to commission a painting we should talk.

My contact info is in the Contact Me tab (pretty sharp, huh?) 
on the front page of this blog.  
If you email, put the word commission or whatever you want to talk about in the subject line.  

Click HERE to view all my available art.  

Thanks so much for stopping by today.

Hope you enjoyed this post.


Saturday, June 15, 2019

How To Use A Script Liner

If Color Mixing Didn't Make You Lose Your Mind -

Learning How To Use A Script Liner Will!

Using a script liner brush has a learning curve,
but it's so important in your art kit
that it's vital to learn how to use it.

I created this video to show you how to use 
a natural hair and a synthetic brush.
I have used a natural hair brush for 20 years and 
in this video is the first time I've ever used a synthetic.
It's no wonder I did better with the natural hair brush.


In this video I'll show you how to paint a small tree with 
many branches as well as grasses with pods.

A new artist should just pull off a large sheet of freezer paper,
(yes, from the grocery store)
and paint on the shiny side.

Over and over and over.
Fill that paper with trees and branches and limbs.
When you start to get the feel of it,
then you can move on to the grasses.

If you enjoyed that video, how about giving it a thumbs up,
and subscribe to my channel.  Next to the subscribe button there is usually a little bell.  Click that little bell and you'll get a notification when I upload a new video on Fridays.
Click HERE to go to my YouTube channel.
There are lots of other instructional videos on my channel.
Enjoy!

Click HERE to see another video on using brushes.

Feel free to share with anyone you think would enjoy it.

I created this video for my Bucket List Artists
FREE Facebook group.  
I do a weekly Facebook live on Thursdays at 1 p.m.
I always focus on things that beginners need to know but it is hard to find the info to help you learn.
Click HERE to go to Bucket List Artists Facebook Group.
Ask to join and then answer the 3 questions.
Then and only then can I open the door and say,
 "Come on in".


Thanks for stopping by today
and let's paint together real soon.

Tuesday, January 8, 2019

How and Why to use a Color Wheel

Do you use a color wheel?

There's tons of info to be learned from a color wheel,
and it doesn't take that long to learn the basics. 

I created this short video on how and why 
to use a color wheel.


Click HERE to watch the video.  

If you like the video, please click the thumbs up button and subscribe to my channel and then click that little bell next to the subscribe button.  
That will notify you whenever I post a new video.

I've created a FREE printable, 7 Tips for Mixing Color, for you to keep handy where ever you paint.
Click HERE to get it.  

Have a great day and thanks for stopping by.

If you're interested in learning how to paint,
please check out my website at


Thursday, November 30, 2017

Product Trial and Review

Trying Colored Gesso

What is gesso and why should you use it?

Gesso is basically a primer for your canvas.
When you paint on canvas, the paint can sink into your canvas, and sort of get lost, or it can skip over small parts of it and small little dots of white will show through.  When you're in the middle painting, you might not notice because you are absorbed in the work, and then, boom, you start to see them after the paint dries.
For years gesso was only white and then a few years back suppliers started making black gesso, and now it is available in colors.

Just like paint, you can buy a student grade or artist grade gesso.  Just like paint, the artists grade will have more pigment and will cost more. 

I have used white gesso for years, and I have toned canvas with a mixture of student grade burnt sienna and white paint, or burnt sienna, ultramarine blue and white if I wanted a gray canvas.
I recently was ordering some different paints to try from Jerry's Artarama and came across several colors of colored gesso.  I decided to give them a try so I ordered two colors, terracotta and gray.  I couldn't wait to try them out when they arrived.


This short video shows how I applied it to a 5" x 7" stretched canvas and to a  1/4" thick poplar board using a #12 bristle brush.

There are several theories about gessoing your canvas.  One is, it smooths out your canvas to accept the paint better.  I agree with that.  But it is interesting that on canvas it does give a smooth surface to paint on but on the very smooth board I used, it gave it a little tooth.  (It must be magic.)  It gives the paint on the board something to hang on to.  Just an interesting observation.

Most canvases today say they are primed with 3 coats of gesso, but since I seldom, if ever, buy really expensive canvas I still feel the need to gesso the surface.  If you stretch your own canvas, then you will definitely need several coats of gesso.

Which brings me to another point, how many coats do I need?
Good question.  Most artists believe you need 2 and you need to make sure the first coat is dry and then sand it, and make sure there is no dust and then do another coat and then sand again.  I do know of one artist who advocates 6 coats of gesso.  I tried that several years ago but for one thing it took forever to get a canvas ready to paint and for the other, it seemed to me like there was too much build up.  I didn't like the finished product as much.

I've also read where you can gesso an item that you wouldn't normally paint on and it will accept the paint.  I haven't tried that, but you know I'm gonna.  

One last thought about using colored gesso.  It does affect how the paint looks on the canvas.  It can either warm or cool your canvas and therefore your painting.  Since most paintings will have variations of warm and cool it probably wouldn't make a ton of difference which color you use.  But if you're going for a primarily cool look, you probably won't want to use a warm gesso, like terracotta and vice versa.  I know!  One more thing to consider when painting.  Well, what's one more thing? 
 Or you can stick with white.

So, as you see in the video, I have 4 supports ready to paint on so I guess I need to get to work.

I'll be reviewing the paints I purchased in the near future.

I hope this was helpful.  If so, share it with your buds.
 
Click HERE to visit my Etsy shop for a mix of my art and some interesting vintage home decor such as glassware, linens and even dolls.  If I find something interesting it might show up there.

If you liked this post, click HERE to see the tab on 10 minute free art lessons on all sorts of topics. 

If you don't receive this blog in your inbox, (what's up with that), scroll back up to the top right hand side and put your email address in the box that says, subscribe to my blog.
I know, not very original, but it does the trick.

Finally, click HERE if you'd like to look over my online beginning painting course, an individual class on painting iris, or a free class on painting daisies.  

Thank you for stopping by my studio today.
Now get out there and create something!  

Tuesday, June 6, 2017

Lots of Ways To Skin A Cat

And Lots of Ways To Paint A Peony

We raise peonies,
lots of peonies!

We have two 50 foot rows of peonies.
One row is several shades of pink
and one row is white.
 
 
And I love to pick them for the house.

 
Love, love, love them!
 
Another flower that is difficult to paint,
but there are lots of ways to accomplish it.
I'm just showing you one way here today.
 
Here's a short explanation of where I'm headed today.
 
Here's a very short time lapse video of the background.
 
This short video explains
 what happened in the time lapse video. 
 
This video shows step by step how I painted the peonies.
 
I have a free class on my website for painting daisies,
so I added some after I finished the peonies
and I added another peony going off the page.
 
 
 Click HERE to go to my website.
Scroll all the way to the bottom and there will be three boxes for my course, a single subject class,
and my free daisy painting class.
Click on that box and then add your email address
and confirm it when you receive a confirmation email address in your inbox.
The whole class will be available to you after that.
Enjoy. 
 
 The next day I painted this peony and daisy painting.
It's funny how when you paint something over and over,
you can begin to loosen up
and things just seem to emerge and happen.
You really start to see things differently.
 
Well, now you have no excuse for not painting peonies.
You have some photo reference,
you have video and explanations of how I did the background
and you have step by step instructions for how to paint the peonies, and you have a free class available to you to learn to paint the daisies.
Once you learn pieces you can put them together in so many ways to complete new paintings.
But it's in the doing and the re-doing,
and the learning and doing again,
that you'll really see progress.
 
You can't just try it once and say,
"Oh, I'm no good, I can't do it".
 
So go get out your paints and give it a go.
 
Have a great day
and thanks for stopping by.


Tuesday, January 31, 2017

Snowman In The Moonlight

Gifted and Talented Kiddos
Paint a Snowman.

Saturday I was invited back to Cartmell Elementary
in Carrollton, KY
to teach two classes of gifted and talented kids 
to paint this fun snowman.

The goal of a painting like this is to learn about perspective,
highlights and shadows, form and mixing paint.

I had two classes with a total of 13 students
and I did a short video of each class.

I know, I'm holding the camera wrong in this one.
Forgive me!


Many of the students in this class have painted with me in the past.  We always have a great time painting together.


I am seldom in the photos with the classes I teach,
but I had a great mom volunteer to take this pic.
Thanks Crystal!
Didn't they do a great job?!?

(The videographer did a much better job on this one)

Some of these great students have painted with me in the past and some were brand new.
Students in the two classes ranged in age from 1st through 5th grades. 

This group was the youngest of the students
and I think they did a super job.
Don't you!

One thing to remember when teaching children to paint, is to teach the concepts and then let them paint.
We don't need to stand over them and guide their hands or make too many corrections.
As long as they understand what they're doing and why they're doing it, 
Mission Accomplished 
in my book.

If they need help on a skill, I will help, but just so they know how to do it, but not enough to make their painting look just like mine.

The one area in this painting where students needed the most help was in painting the moon.
But for the most part, I showed them how to achieve the round moon and they went right at it.
Most adults would be scared to death to put that yellow/white paint on that blue/purple sky.
That's one of the things I love about teaching children.
They will give it a shot without a lot of drama or fear
where adults struggle with confidence.

On their super Saturdays they do math and science projects and classes, as well as classes in the arts,
and a lot of fun stuff.

Thanks Pam for providing a fun and interesting program for these great ladies and gentlemen.

I had a ball.

If you would like to host a party for your posse,
your kids, your co-workers or your team,
click HERE to get the scoop on it. 

 Have a great day and thanks for stopping by.

Thank you for sharing this post with anyone
 you think might be interested. 

Thursday, January 12, 2017

Turquoise Door

Enlightenment

 Enlightenment
36" x 15"
Unframed $200
Framed $300


Framed or Unframed


This has been a lot of fun working on this painting
with the turquoise door.
It started last year when I found this frame at a flea market.
I loved the frame and even before I bought it,
I sort of knew what I wanted to paint to put in it.

Well, then I couldn't find a canvas that would fit it's odd size.
So I had to stretch my own canvas.
(totally new experience)

I did a sketch of the door one day while my husband was having surgery.
It has changed considerably since then.

It even changed after I drew the sketch on the canvas.

My first drawing did not have the door open.
But then I got this bright idea about having the door open slightly with lots of light pouring in around it. 
Lots of symbolism involving light.

It changed all along the way.

It started out with a dirt path and stones in it,
(stones not shown here)
But to me, it felt more like a creek bed,
so I changed that.
With that dark in the middle of the dirt path it deepens it,
and even after I put the rocks in it, it still had a creek bed look. 
So out cam that path and in went another one.
You can do that in acrylic paint really easily

My goal was to have the door slightly open
with lots of light coming in around it,
even though there is no light source behind it.

I wanted you to think about that.
Where does light come from 
and
how it affects all things around it.
 Including our spirits.

As I painted the trees, bushes and flowers and added the rocks, I tried to keep that light in mind and how it would affect things it fell on.

To me, this painting is somewhat magical.
It's inviting us to come into that light,
just because it's there and we are curious beings.
We would be curious as to what is the source of the light,
what is on the other side of the door,
Why is it coming out the door, but not around the rock wall holding the door?

So many questions,
in a rather odd shaped space.

Please leave me a comment about what you think will happen when you walk through that door.
Maybe we'll write a book!

About the frame,
I know you don't see it.
You don't see it, because I'm still working on it.
It's a heavy carved framed,
but I wanted to lighten it up also. 

Want to Learn How To Paint?

I have created the perfect course for beginning painters, regardless of your age.
It was created with home school families in mind to use as an art curriculum.
It is also perfect for that individual who wants to learn the basics of art, why things work, how to make them work, etc.

Click HERE to view the course.

Thank you so much for stopping by today
and for taking the time to comment.

I really appreciate them!!!  

Tuesday, November 29, 2016

For That Guy Who Needs NOTHING!

Frustrating, I know!

We all have that guy on our list who needs NOTHING
and doesn't really want anything.

You search, and search,
and shop and think!

 Art is often something people would love and enjoy
but won't spend the money on themselves.

I have a suggestion and I'm pretty sure 
I can help you in any price range. 

Let me show you a few things he might like.
(We'll talk about women tomorrow)

I call this Man Cave Art
6" x 6" Acrylic on a panel.
Sits great on a shelf on an easel (not included)
$50 + shipping


8" x 8" Hog Wild
Unframed Acrylic on a panel
$95 + $6 shipping 


8" x 8" Unframed Acrylic on a panel
Red Case
$95 + $6 shipping


 11" x 14" Acrylic on stretched canvas
Framed (not shown) in a rustic barn wood frame.
$175 + $20 shipping

Augusta Ferry


Here are several other options for you if that's not enough.

Click HERE to go to my Etsy Shop.

Click HERE to view available art on this blog. 

Don't forget!
I give away a painting every single month,
but you have to subscribe to this blog to be entered.

Enter by signing up with your email below.
Then you'll receive an email asking you to confirm that you did sign up.  Click the confirmation link in that email.
While you're there, drag my email into your primary folder so you'll know if I contact you as a winner.


Tuesday, August 30, 2016

Between A Rock and a Garden Place

Beautification Project

The Mayor of Carrollton, KY., 
Robb Adams came to me and asked me to help him
in his part of a Carrollton Beautification project.

Around the town square there are cut outs,
that until recently haven't been utilized well.
Some businesses planted flowers in them 
and other places were just left bare.
Then they started an adopt a cut out campaign,
and that's how I got involved.

He brought me a big rock and little business card,
and wanted me to marry them up. 

 I drew out the letters on a big piece of craft paper,
got his approval
and then cut it apart and transferred it to the rock.
 I'm working outside as you can see

 I'm under a pop up tent to protect me and the rock.

This is how I transferred the writing.
I had to cut it apart to transfer because when I created the template, I wasn't happy with the spacing in several places.

 Mayor Adams cut out is the largest one on the square
and you can see here where to stone is.


There are all sorts of beautiful 
perennial plants in his garden.
 
Carrollton is located at the confluence of
the Ohio and the Kentucky Rivers.
The rock had an indentation on one side,
and lots of interesting crevices along the bottom.
I used them to represent the two rivers and in
the corner represents Point Park,
where they come together in Carrollton.

Where Rivers and People Meet
Eastablished1838.

Click on the pic below to get signed up to receive this blog and a monthly newsletter in your inbox.
It also gets you entered to win all the goodies I'm giving away in September for my Blogaversary,
as well as a monthly painting I give away.


Receive my blog in your inbox

About Me

My photo
Ghent, Kentucky, United States
I'm a nature artist and I love to paint old barns, rivers and lakes, trees and fence rows and flowers. I work almost daily. You can purchase paintings by contacting me at slgraves6@gmail.com and there is also a tab across the top of my blog for available paintings and one for small paintings with buy now buttons. You can also purchase through my Etsy shop using the name of Fine Nature Art. . Thank you so much for stopping by.